
literally.
literally.
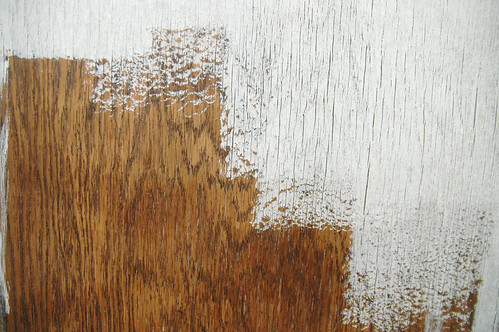
90% of the wood in our 100 year old house has been painted over the years. for whatever reason the dining room was left untouched. we’ve contemplated stripping and refinishing all the trim in the house to make it brighter but it’s just too daunting of a task.
it feels so wrong to paint over the 100 year old wood, but it must be done.
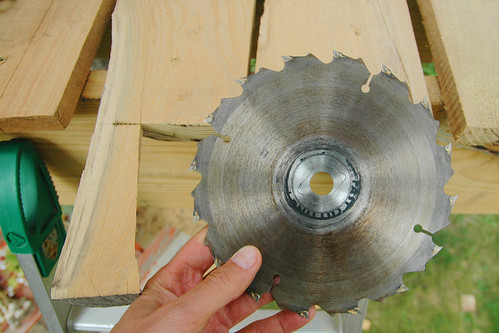
if you’re keeping score, the amazingly dense black locust has broken jigsaw blades and a drill bit and today while trimming the ends off the treehouse deck boards it wore my circular saw blade down until it was totally smooth and about as effective at cutting as a butter knife.
granted it was an old blade – the lesson learned, if you’re ever working with black locust be prepared to invest in new blades and drills bits!
yes, we know the black locust is dense enough to break new jigsaw blades.
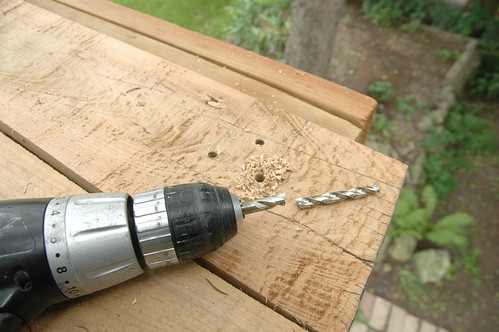
and tonight it caused my 5/16th inch drill bit to get so hot from friction that it snapped!
i can’t imagine working with it without power tools like some of the amish builders in the area.
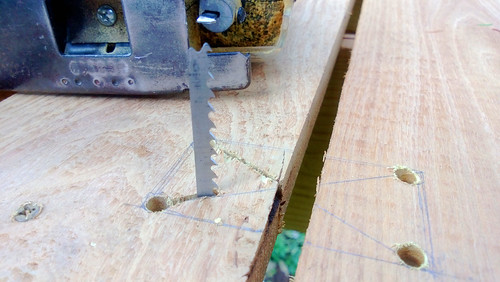
i’m trying to cut out holes for the railing posts in the black locust decking for the treehouse so, you know, nobody falls over the edge.
the black locust is so dense it’s breaking the jigsaw blades!
just drilling the holes in the corners of the area to be cut out quickly drains the cordless drill battery.
it’s amazingly tough stuff.
about 7 weeks ago i was almost ready to put on the decking on The World’s Most Awesome Treehouse(s) and wrote:
“one big remaining decision – to use pressure treated decking or not? i think i’m leaning towards pressure treated to help prevent decay. i’m thinking that anything i put on unfinished decking to prevent rot is going to be at least as unfriendly as pressure treated lumber. suggestions?”
well, you all did have suggestions and pretty much mostly everyone recommended avoiding pressure treated lumber when kids are going to be in regular contact with bare feet, if for no other reason than following the precautionary principle because there’s not-so-fun chemicals involved in pressure treating lumber. all a good reminder of something i already knew. but what wood to use instead of a pressure treated lumber that wouldn’t require treatment with chemicals to prevent rot?
a bunch of local folks recommended finding an amish sawyer who would mill black locust which is extremely hard and renowned for its resistant to rot. local folks who build decks out of the wood claim you don’t have to do anything to it and it will last decades or longer. perfect! and as an added bonus i would be supporting local sawyers whichy is A Good Thing.
it took a three weeks but i finally found a sawyer who was quite reasonable with price ( $1 per board foot, which is actually cheaper than cedar decking from a big box lumber store ) but originally he was so swamped with orders he wasn’t going to be able to fit me in for “a couple of months”. i must not have done a good job of hiding my disappointment on my face because he immediately said, “well, how much do you need? oh, only enough enough for 14’x16′ deck? well, i think we can try to squeeze you in. see ( with a twinkle in his eye ), this is my downfall, i try to make everyone happy.”
with a handhshake i’d come back in 3 weeks. in the end, because of other obligations they needed 4 weeks to squeeze my order in, which puts me 7 weeks behind but i’m just happy to be making progress and doing it the way i want.
i get ready to go out to the sawyers to pick up the wood with the vague idea that i’ll just make couple of trips in our jetta. i thought if i put the back seats down i could probably fit 8 feet in the car and have 6 feet hanging out the back, but i remembered the sawyer said he’d give me generous 14 foot boards, closer to 15 feet, so i’d have more than enough overhang to trim. right before i left to pick up the wood i thought i’d better measure how much room i had in the car with seats down and was suprised to discover i could only fit about 6 feet in the car.
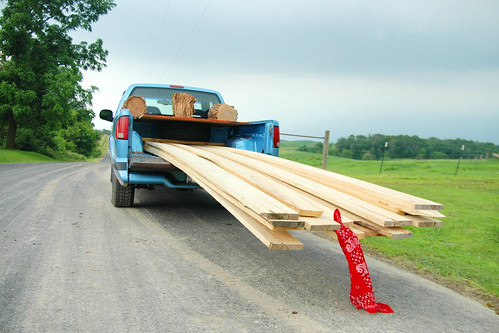
uh, oh. there was no way i could drive down the road with 9 feet of board hanging out the back of the car. so i quickly tried to procure a trailer or a truck and could only come up with a compact chevy s-10 on short notice which gained me a couple of feet with the gate down, which still meant i was going to have 7 feet hanging out. oh well, it was the best i could come up with so i figured i had to make it work and drove out the sawyer’s place.
with the head sawyer, i loaded thirty two 14 foot boards in the bed of the truck and watched the bed sink lower and lower. because black locust is one of the hardest woods, it’s also veeeeery heavy, expecially when it’s still wet and from a freshly cut tree. the little chevy s-10 was sagging under the strain and the ends of the boards were really close to the ground after the wood were loaded. and even with the truck bed, the wood was teetering precariously. but ever the optimist, i thought i’d give it a test by driving a couple hundred feet from the saw mill to the end of the driveway. driving slowly up from the mill i could hear the boards dragging on the gravel driveway and slowly pulled up to a half dozen amish young sawyer men sitting on a huge hay wagon hitched to a team of very strong work horses. they all had big smiles on their faces. it was clear they they were all wondering if i was really going to try drive all the way back to town. the juxtaposition of me in my little s-10 and they in their big horse-drawn wagon was amusing.
i said, “nope. i guess this isn’t really going to work.”
they all let out hearty laughs. a few said simultaneously, “nope.”
one said, good naturedly, “i think you might need a wagon.”
“yup. i think you’re right.”
they helped me unload half the wood and we rigged some plywood and a spare tire and some logs to weigh down the wood in the bed of the truck that kept the overhanging wood from barely dragging on the road and i set off for town, slowly.
i got lots of looks from folks along the way, but made the two trips without incident 🙂
i was out with some friends recently who burn wood in a fireplace and they were raving about an “upside down” fire technique they read about in timothy ferriss’ book “the four hour chef” which was originally posted on his blog, “How to Build an Upside-Down Fire: The Only Fireplace Method You’ll Ever Need”.
with the upside-down method you put the largest logs on the bottom ( make sure there is no space at all between them ), tut a second layer of smaller logs on top of the large layer with no spaces between them anbd so and so forth until you top with a layer of kindling and paper.
as a card carrying member of the traditional “tipi” method of building fires ( with the kindling at the bottom and logs at the top with plenty of space for air to flow through ) this method sounds like nothing short of heretical craziness.
THE BIGGEST LOGS ON BOTTOM?! YOU HAVE NO AIR FLOW! WHAAAAAT?
but my friends swore by the method and best of all they said it was very easy to maintain which would revolutionize building fires for the sauna. because while i love having sauna, starting a fire with the tipi method means committing yourself to tromping down to the sauna every 20 minutes or so for the first 90 minutes while you slowly build up a bed of coals and bring the sauna up to proper temperature.
could it possibly be true? with an “upside-down” fire could you really “set it and forget it”?
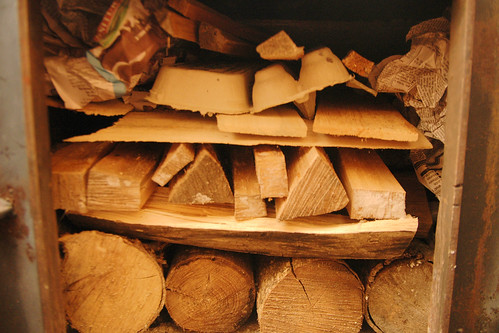
to put it to the test, i stocked the sauna stove chock full of full with the largest logs on the bottom, layered with very little space between logs and layers and a modest amount of paper and kindling on the top.
at this point i was skeptical that it was going to keep going after it burned through the kindling.
clearly there’s not enough air flow.
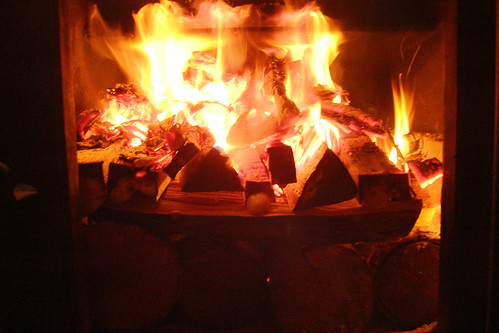
after about 15 minutes, which is about the time i’d normally have to go back down to the sauna and tend to the fire, it’s burned through the kindling and looks like it has a good start on the layer. and doesn’t need any stoking or poking!
after 30 minutes, it’s really starting to go. the middle layers are fully engaged but i’m still skeptical there are enough embers to keep it going and that the bottom logs will do anything other than smolder.
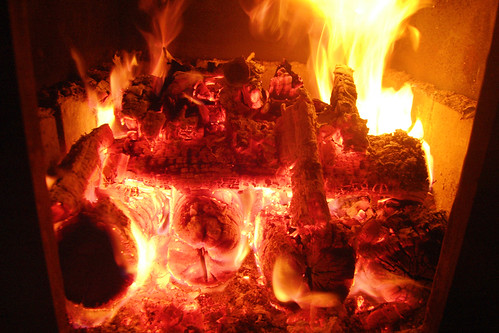
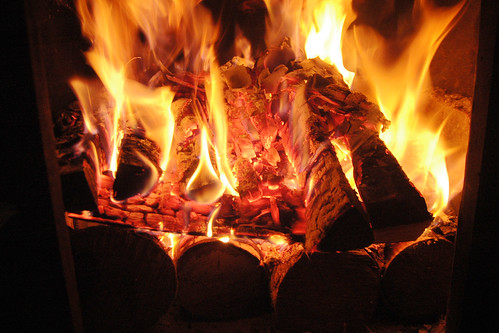
well, whaddya know, after 60 minutes even the large logs are fully engaged and there’s a solid bed of coals going! all with no tending! i probably could have let it go for another 30 minutes of so without needing to add any logs.
so, from a “set it and forget it” standpoint the “upside down” fire is an unmitigated success!
i’ll experiment more in the future and see how i can boost the heat output of the fire. at this point it was about 70°F in the sauna which is a long way from the 190°F-210°F you want for a proper sauna ( at least in our sauna, according to our temperature guage ). timothy claims the “upside down” method produces much more heat than a traditional “tipi” but i didn’t find that to to be the case.
it didn’t produce any less heat per se and generated a nice bed of glowing embers which made it easy to throw more wood on and quickly get it to temp but it’d be awesome if i could find the perfect combination of wood to “set it and forget it” and get it to temp all at once in about an hour.
the upside-down fire was so successful, i think i might have to check out “the four hour chef” to see what else i can learn 🙂