i mentioned i was interested in getting into kite aerial photography with odin so first things first, we needed to build a rig and test it out. as i mentioned in previous post “kite aerial photography 101” rig seemed about my speed – not too complicated and not too expensive and looks like it takes great pictures.
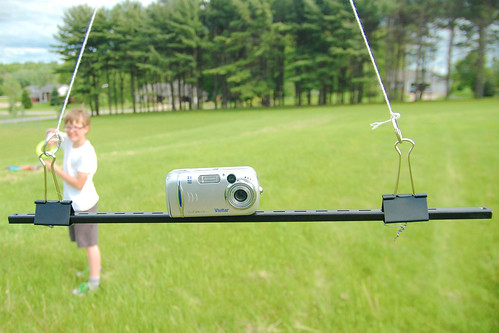
so we built a simple rig out of an 18″ bookshelf bracket, some large clips, a few key rings and string and decided to beta test the setup to see if the kite could generate enough lift with a test camera that didn’t actually work so we wouldn’t feel too bad if we crashed the kite.
but first, we wanted to test the kite with the bracket attached to the kite via about 50 feet of string but without a camera attached.
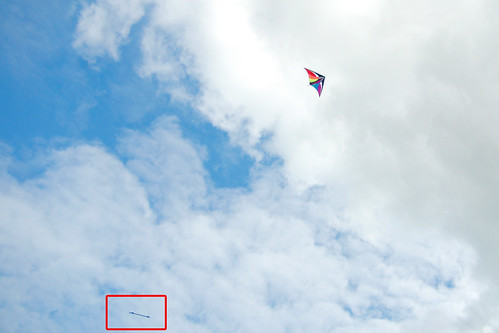
much to my surprise even with out little 4 foot delta kite – it worked !
i highlighted the bracket with a red rectangle to make it a little easier to see.
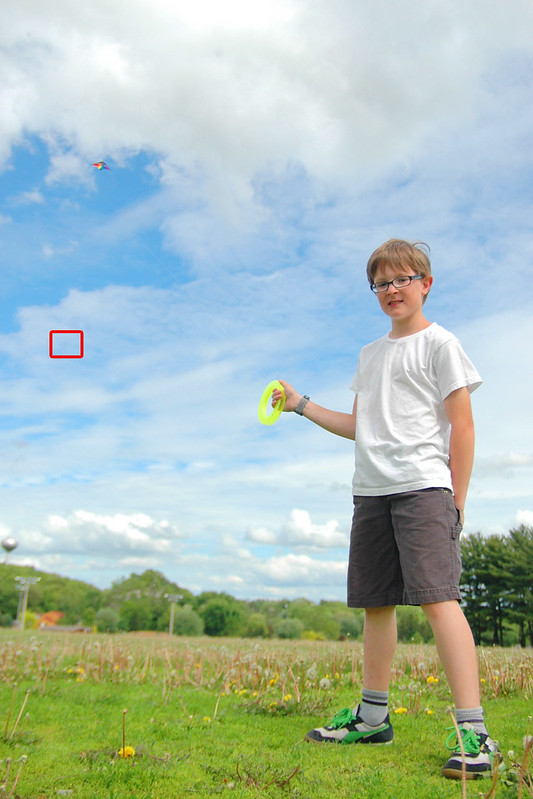
here’s another view of the maiden flight sans camera. letting the bracket swing 50 feet from the kite ( highlighted in red ) i think helps dampen the vibration down the string which is how you’re able to get such good images without complicated set-up but it does make it a little more difficult to get the camera really high up the air when you only have 150 feet of kite string! clearly we need more kite string
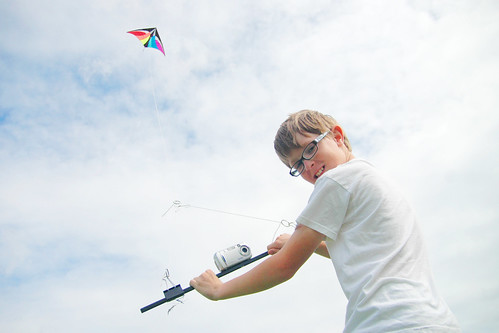
then we attached the non-functional camera and shortened the distance between the kite and the camera to around 30 feet to see if the camera/bracket swayed any more erratically than with 50 feet ( it didn’t ). i’m sure when we start taking photos we’ll need to do some experimentation to get the an optimal distance for clear images.
even with the added weight of the camera, the little delta kite generated enough lift to take the camera up in a relatively tame wind. i think the rig we have will be fine for similar sized point and shoot cameras but we’d definitely want a larger kite if we were going to send up a dslr.
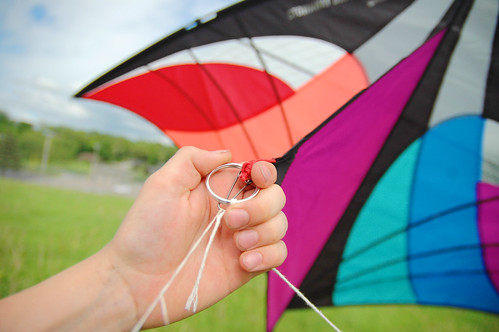
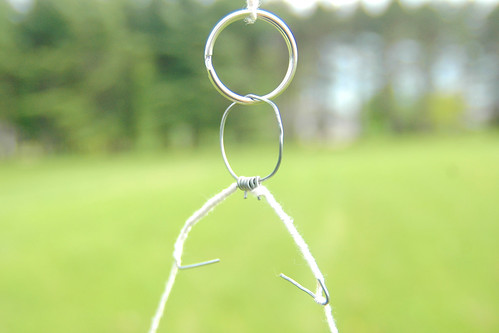
we used a simple key ring to attach the rig to the kite. easy peasy to put on and take off!
the other end of the string that is connected to the kite is attached to a simple hanger fashioned from metal wire with another key ring.
and here’s the business end of the rig which is attached to the hanger. it’s simply a bookshelf bracket with oversized clips attached with a some metal wire twisted through the bracket slots and a few key rings. very, very easy to put together and quite affordable for a test rig.
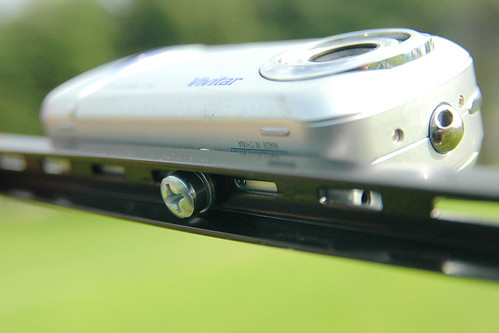
the camera is attached via the tripod mount on the bottom of most cameras with an appropriately sized screw. as you can see, the nice think about the book shelf bracket is that it already comes with slots or attached more cameras
as i mentioned the beta test was with a non-functional camera so we wouldn’t feel too badly if we crashed the kite and ruined the camera. next, i need to find a functioning camera that cheap enough that i still won’t feel too bad about wrecking if we have a crash but that has the ability to take interval shots ( e.g. take a shot every 30 seconds ) which is normally a feature reserved for higher end cameras.
it turns out the canon hack development kit lets you add that feature to just about any canon camera, even an aging point and shoot.
so who has and old canon point and shoot sitting around gathering dust that they’d like to donate to our kite aerial photography adventures?
some of you might be asking why on earth we’re doing this? here’s a great gallery of spectacular kite aerial photos that gives a good flavor of the types of images we’re hoping to capture.

2 thoughts on “day 3255: beta testing the kite aerial photography rig!”