Tag Archives: project

adventures with a hundred year old house and light fixtures.

adventures with a hundred year old house and light fixtures. I.

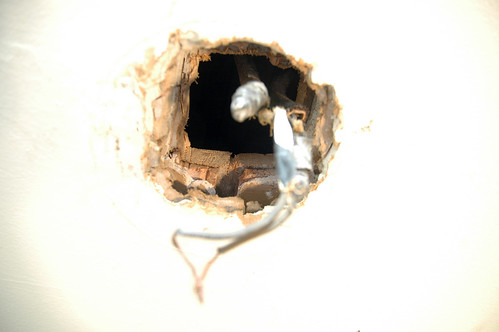
ah, the fun of owning a hundred year old home. the light in our kitchen started look like it was ready to drop down from the ceiling as the screws keeping in place were coming loose.

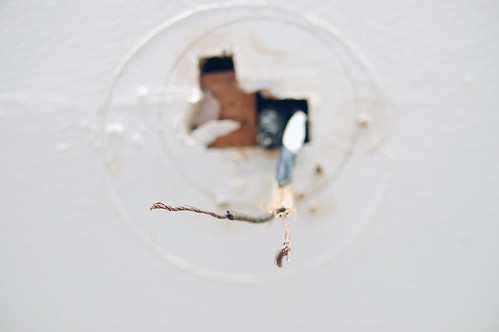
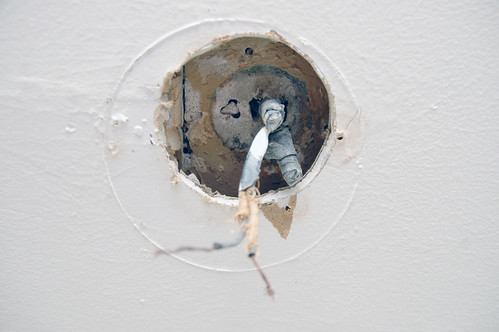
based on past experience, i had a hunch the screws were simply screwed in the ceiling with no junction box.

turns out, i was right!

looks like i get to spend the afternoon tearing into the ceiling! the extra “fun” part about old houses is you never really know what you’ll find when you start digging around.

adventures with a hundred year old house and light fixtures. II.

the easiest thing to do would be to put in a special retrofit kit that has a box attached to a bar that extends so it can be secured to the joists in the ceiling. that plan was foiled when i opened up a hole and discovered the ceiling is actually drywall hung on 1″x2″ runners that are secured to the original plaster ceiling. the standard kit won’t work because it doesn’t assume you have 5 inches of plaster and lathe and drywall sitting between the joists and opening. fun times.

now i have to go “all in” and rip out the old plaster and lathe and whatever they are attached to get enough clearance to put in a junction box.

the only question is, which way to the wires run up in the ceiling? if i make the wrong decision when i start removing wood with the jigsaw i’ll sever the wiring.

i’m feeling lucky. i guess.

adventures with a hundred year old house and light fixtures. III.

i’m lucky. i guessed good and didn’t nick any wiring.

adventures with a hundred year old house and light fixtures. IV.

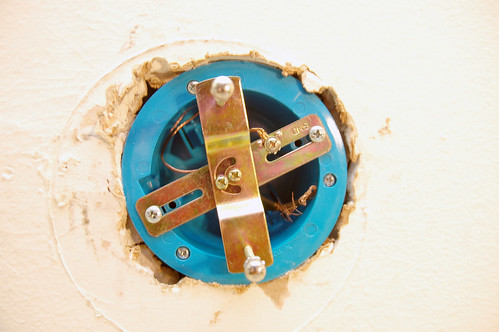
since there’s no room for the retrofit kit that’s secured to the joists i have to go with the second best option of using a box that has little wings which swing out and secure the box to the drywall. i won’t be hanging a ceiling fan off this box but it’ll be good enough for most light weight fixtures.

adventures with a hundred year old house and light fixtures. V.

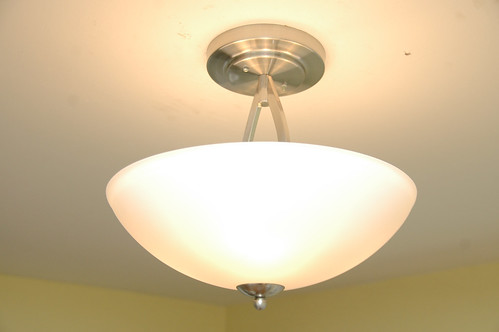
five hours and an epic number of trips to the hardware store later – mission accomplished!

there’s probably a half dozen fixtures around the house that will need similar work and i’m sure each will be unique in their own little ways.
i think i found my next project – building a blacksmith forge.

i was reminded today when i watched a blacksmith forging steel that i’ve always wanted to learn to make some simple things by working metal. but i always thought the cost and complexity of building a forge was a deal breaker. turns out, it’s not that hard to build a forge. the basic brake drum forge design in this video really suits my style.

you should watch the video all the way to the end. i would love to hang out with this guy and learn how turn metal.

i ran the idea by odin and he’s excited to make a forge in the coming weeks and learn some basic metal bending.

a labored day.

a labored day. I.

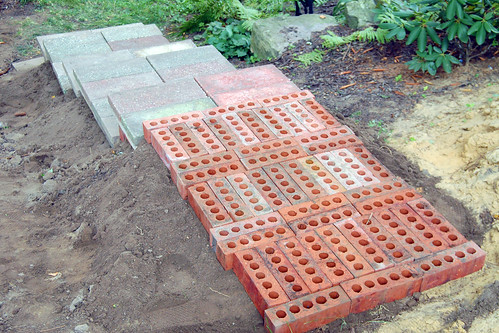
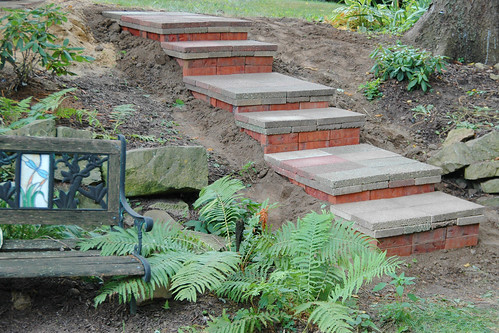
it’s labor day here in the U.S. so what better time than to use the extra couple of yards of dirt, and a couple of hundred bricks and pavers we have laying to put in steps from the treehouse to the sauna. what better way is there to spend 6 hours on labor day than hauling dirt, bricks and pavers?

i’ve been planning on putting steps down the hill ever since we built the sauna 5 years ago but there’s always something more fun to do that put in steps and we didn’t ever have enough dirt or bricks or pavers to put in the steps. but slowly over time we’ve accumulated everything we needed from other projects ( or planned projects that never happened because they weren’t good ideas. like the time i thought i was going to build a huge charcoal/gas grill with wood fired brick oven combo monstrosity in the backyard. i bought hundreds of bricks and then decided i didn’t actually want a large brick oven in the back yard 🙂

a labored day. II.

the steps are mortarless. i put down enough dirt to create a level run then layed down a layer of bricks then two layers of pavers. i have no idea if it’ll stay level. it’s running between two trees that have thick layers of roots close to the surface and the ground doesn’t seem to shift very much. who knows maybe i’ll be constantly futzing with leveling and releveling but i’ll remain optimistic until proven otherwise.

i totally “winged it” on the rise over run and just started building a pattern that looked like it was going work out right. it did!

a labored day. III.

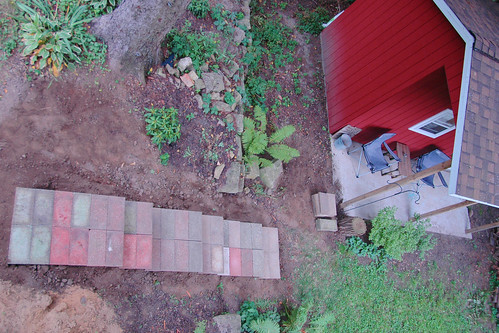
the view from the treehouse deck down the steps to the sauna. while sitting in front of the sauna is fun between rounds of throwing steam, i think sitting up in the trees will be nice.

maybe someday i’ll put a fireman’s pole off the deck so we can slide down to get the sauna just that much faster.

i can *finally* scratch “build cedar window boxes” off the to-do list.

i can *finally* scratch "build cedar window boxes" off the to-do list.

building two 7 foot long cedar window boxes isn’t really all that hard, but like most projects it’s never going to get done unless i set aside the time to actually do it! so, this year i made the perennial to-do item on my list a mother’s day gift for kris so i’d be sure to get it done 🙂

they are simple boxes made similar to what’s shown in this martha stewart cedar window box how-to. i used three 1″x10″ cedar boards with 2 1″x1″ cedar “cleats”, which hold the front and back and sides, drilled and glued to the bottom board. i trimmed the bottom board to 8″ wide so i could flare out the front of the box to give it a little more style that a simple rectangle.

i suppose i could fancy them up with some trim at some point.

how i learned to stop fearing and start loving stripped screws.


last week i spilled a glass of water on the butcher block next to stove which somehow shorted the “meat probe” wiring and rendered the oven non-functional.

even though this site doesn’t recommending fixing it yourself, i thought it was worth a try. i mean, how hard could it be to take the side of the stove off and repair the wiring?

turns out, you have to take the top of the stove off before you can take the side off and before you can take the top off you have to remove the burners which are attached with torx screws. and one of the torx was so corroded from one too many boiled over pots of water that i couldn’t remove it.

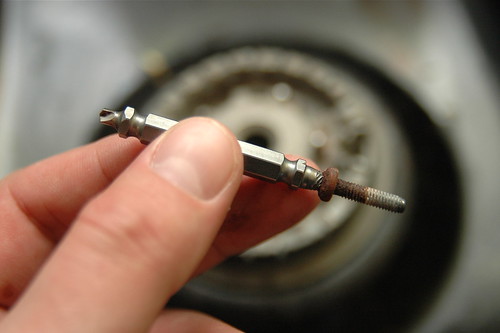
what to do? a quick googling of “how to remove a stripped torx screw” revealed this handy video showing how to use a “screw extractor” and it turns out the fine folks at our local hardware store had a “grabit” extractor in stock for the low, low price of $13.

after years of fearing stripped screws on home projects, could it really be just that easy to remove them? why yes, it is.

just use the drilling end of the tool to give the extractor end something to grip on to and you’re in business. easy peasy. i have no idea how i made this long without knowing such a tool existed.

The Mysteriously Impervious Material in the cedar closet.


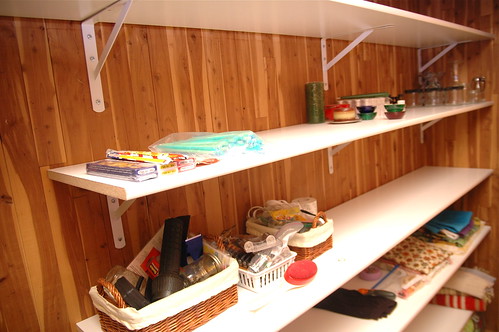
in a testament to my powers of procrastination, for – oh – about five years since we moved in, i’ve been thinking about putting shelves in a closet in our 100 year old house that was, curiously, lacking any. it’s a big space, about 9 feet long and 2 feet deep, and installing shelves could cure The Clutter Problem that continues to plague us. such a simple project! why had it taken me so long to just drill some holes and hang the shelves?

it never once occurred to me to ask why prior home owners had never installed shelves.

the answer quickly revealed itself when i tried to drill holes in the cedar to install screw anchors. after boring quickly through the wood, the bit immediately stopped against something very, very solid. i thought maybe the drill bit was dull so i went to our local hardware store and purchased a shiny, new titanium bit that advertised itself as being good for all materials except metal.

nothing. no amount of pushing, pounding or tapping could get the drill to make the slightest bit of progress. so, using Impeccable Powers of Logic, i went back to the hardware store i went to buy a special masonry bit on the assumption that if the titanium bit wasn’t working that i must be working against some sort of concrete or brick. our house has a stucco exterior and plaster interior walls so brick or concrete under the cedar would be a bit of a mystery, but sometimes 100 year old houses like to keep secrets.

since i learned long ago that there’s nothing that can’t be helped with an extra helping of elbow grease, i really leaned into the masonry bit with great gusto while drilling at high speed. but despite all my huffing and sweating and cursing i managed to produce nothing more than curious wisps of smoke around the cedar hole.

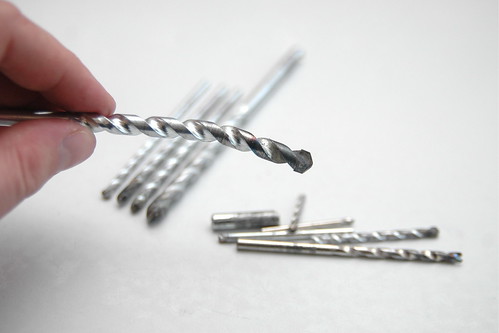
and eventually i managed to simultaneously break the 5/16″ masonry bit shaft and bend the end of the bit. not that’s talent. i took it back to the fine folks at nelson’s agri-center and they were so impressed they gave me a free replacement, though it was a headscratcher for the Nice Man behind the service counter. “you sure you ain’t trying to drill through metal? i’ve never seen a burnt and bent masonry bit. maybe try starting small and work your way up to 5/16ths.”

so armed with a variety of masonry bits i went home and started small with an 1/8th inch bit. which promptly snapped after i applied too much pressure and let it get too hot.

eventually after a few more trips to the hardware store i finally discovered the secret to penetrating the impervious mystery material – go slow, don’t apply too much pressure, don’t the bit get too hot and work slowly up through 4 bit sizes from 1/8th to 5/16th. patience is the key.


success! finally! nearly 50 square feet of shelving where there had been none. now i just need to come up with some sort of organizational system for the shelves. and a door for the 92 inch opening. ah, the joys of never ending projects.


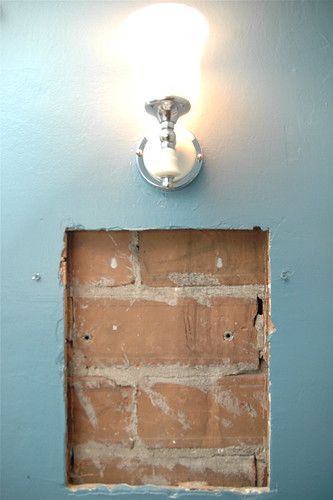
the mystery still remains, though, as to the true nature of The Mysteriously Impervious Material. the cedar closet is in room that was an addition to house at some point after the original construction and it’s built on what would have been an exterior wall. all interior walls are plaster, but on a previous project when i was installing a new light in our bathroom, i discovered a hole under vanity on the exterior-facing interior wall. i was surprised to find over-sized bricks, right under the plaster and lathe.

i assume all the exterior walls are brick? perhaps the owners just put cedar over the brick in the closet and didn’t even bother putting up plaster? was our house originally brick and stuccoed over later? or is this some sort of special Magically Impervious Stucco Brick?